Now, some folks might not have the patience to deal with this issue, so they might go off and use an alternative browser for a while. For those who are not interested in switching to the likes of Microsoft Edge and Mozilla Firefox, you may want to follow this guide.
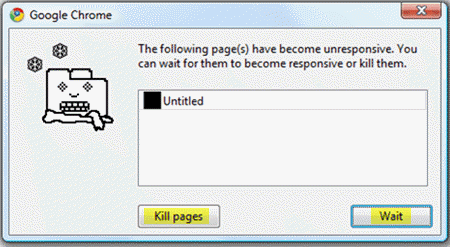
Google Chrome Kill Pages or Wait error
If Chrome browser throws up an error box with message – The following pages have become unresponsive, with two options – Kill pages or Wait, here are some suggestions that will help you fix the Page Unresponsive error in Google Chrome:
1] Clear Chrome’s cache
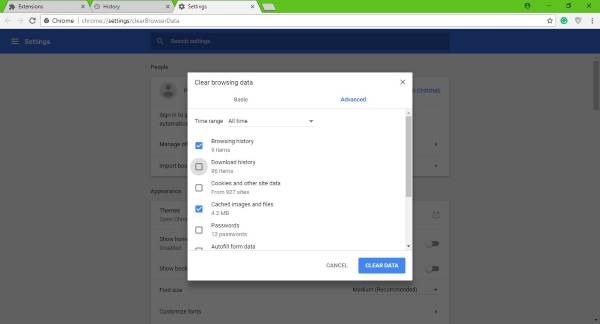
The first step in fixing this issue is to clear the cache in Google Chrome. Do this by clicking on the three dot icon, then select History from the menu. The next step is to click on Clear browsing data and choose only History and Cached images and files, then hit Clear Data at the bottom.
2] Problems with extensions
There are times when problems with a browser are all due to a faulty extension. To figure out which one is the cause of all your woes, disable them all, then reinstate them one-by-one. We do this by clicking on the menu icon, which is the one with the three dots at the top-right. Click on More tools then go to Extensions. You should now see a list of all the extensions installed. Disable all of them and restart Chrome. Finally, re-enable them one-by-one and be sure to load a web page each time to find out which Extension is acting up. Alternatively, you could also remove the Extensions you no longer use.
3 Disable Cookies
OK, so you’re not going to disable all cookies, just the third-party ones. Here’s the low down. Open a new tab in Chrome and type chrome://settings/content into the address bar. Go to the section that says Cookies, then click on it and select Block third-party cookies and site data. We should point out that blocking third-party cookies isn’t perfect because many websites rely on cookies to load properly, so only use this option as a last resort or until Google releases a fix for Chrome.
4] Rename default User Data folder
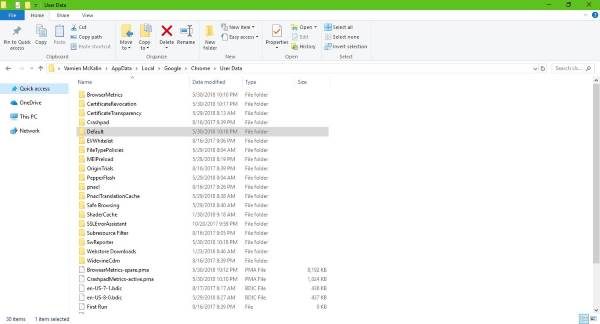
Click on the Windows Key + R to launch the Run dialog box, then type %localappdata%, and finally, press Enter. After that, go to Google\Chrome\User Data\ folder, and rename the folder that says Default to Default Backup. If you want, you can delete the folder, it really makes no difference in the grand scheme of things. Restart Chrome and try loading a webpage again.
5] Reset Chrome
If everything else fails, then it’s time to reset Google Chrome to its default factory settings. Doing this will usually fix most problems, but there’s a downside. You see, if you’ve not enabled Chrome to store data in the cloud, you’ll lose everything. To reset Chrome, click on the three dotted menu icon, then select Settings, and navigate to Show advanced settings. Scroll with the mouse to the bottom and finally click on Reset to restore Chrome to its original setting.
6] Reinstall Chrome
The last straw if everything else fails to work, is to remove and reinstall Google Chrome. Launch the Settings app and go to System > Apps & features. Find Chrome and uninstall it from your computer. Visit the official Google Chrome website and download, then install the web browser all over again.


